Showing posts with label wedding projects. Show all posts

Wednesday, September 29, 2010

A Unique Idea???

I know, I know...technically I'm not a bride anymore. I'm a wife. But just like all good addictions, checking out wedding photographers isn't something that I've been able to completely tear myself away from yet. I unsubscribed to weddingbee LONG ago...but I still stalk a few photographers...one of them being my own fabulous photographer, Christina Carroll.
Imagine my surprise when I came across something sort of unique today on my stroll. Maybe you've seen something like this before, but I haven't. I don't know if the bride did this project DIY or if someone else did it, but I think that it really makes a statement.
It's a wreath hanging suspended over the dance floor (like a chandelier?) and hanging from it instead of lights are small tea light candles. They're hanging with plain twine, giving it a cozy-homey feel to it and making me think that this was made. Here's a picture of what I'm talking about, and since it's a collage picture you can see that the wreath totally fits in with the theme of the rest of the wedding decorations and there's a close up of the tea lights:

Here's another picture where you can see it in the background:Isn't that GORGEOUS?!?! You can find more of these awesome pictures here at Christina's blog - check out the rest of the wedding, I got sidetracked with the wreath/chandelier and couldn't focus on anything else...LOL!

Tuesday, May 11, 2010

Our Cake Buffet

Next on my list to post about is cutting our cakes…but how can I do that without paying tribute to the cake buffet first?!? I can’t, I tell you, I just can’t do it!

Making the decision to have a cake buffet instead of just one cake with two or three flavors was like doing simple addition in my head. You know the kind – like knowing that 2 + 2 = 4…those little math problems that you don’t really even have to think about to get the answer (not the ones that require use of fingers and possibly toes to get there!). I thought to myself about what my favorite cake flavor might be, and what kind of cake that B would like best…and I have to admit that the list was long…really long.

Not that B was contributing much to the list…his favorite cake is hands down Red Velvet. And the only other request that he had made was to include German Chocolate cake for his Dad. My side of the list? Not NEARLY that short! I immediately (without pausing to consider if my fingers were ready for counting) had strawberry, Italian Cream, white with raspberry filling, chocolate, Red Velvet and Carrot. (Yes, Mom, that’s a new one that I’ve developed over the past few years.)

So you see how the math led to the cake buffet, right? Right. Plus, at the time I was reading a lot on weddingbee.com and there were SO many other brides providing me with LOTS of inspiration on the cake buffet front…so it was a done deal. B didn’t even argue on this one!

Just to make it a little more special, I decided that I would have all the moms in our lives bring their favorite cake plate to serve one of the cakes on. Since we were having more than just three cakes (that’s the number of Moms that we have between us) I also extended the invitation to my Maids to have them also bring a cake plate that was special to them. MOH at some point suggested asking those bringing cake plates to also bring serving sets if they had them, which was a BRILLIANT thought and just goes to show that my thought processes stopped at the cakes!

I bought a length of black velvet on sale at a fabric shop off of Harry Hines Blvd in Dallas – favorite fabric shopping place of all time! – and the table was given some height by standard cinder blocks from Lowe’s/Home Depot. We had planned on taking these back after using them – don’t hate on me for being frugal! – but I think that we’ve actually still got them. For what, I don’t know…but they’re in the garage, and that’s B’s domain.

So here’s a shot of the set-up…
And another shot at night, since I think that it shows up a little better…
And just to showcase our baker, Michelle with The Sweet Stuff out of Kyle, TX here are some close-ups of the individual cakes.

More of a traditional wedding cake style…I think that this one was Strawberry…
A newer design of just swirls that sort of mimicked our invites and other paper goods…this one might have been Italian Cream Cake with Cream Cheese Frosting...
A standard German Chocolate cake…
This one was a Chocolate cake with Raspberry filling and chocolate icing with Chocolate Ganache on top…I’m not swearing that I know what Ganache is…but it was yummy! This is one that B saw in her book of cakes when we went in for our tasting and he HAD to have it!
And just to remind you about one of my little projects…here are the tent cards that I made for the cakes telling our guest the cake falvor and frosting information…
And now, the crown jewel…the most beautiful of all of our cakes…our two-tier wedding cake…
It was Red Velvet with Cream Cheese icing and Michelle took our exact scroll that was on all of our paper goods and copied it onto our cake. Not only that, but she also copied the monogram that I had designed, which was SO cool to me.

I had originally wanted to do a cake topper out of the monogram but ran out of time figuring out who to do it, where to get it and how much would it cost. This was free, included in the cost of the cakes, so killing two birds with one stone was worth the price of my sanity by that point!

All in all, I was thrilled with the work that Michelle did on our cakes. We were able to pick up the cakes the day before the wedding and store them onsite in our Reception Hall refrigerators and just placed them on the cake stands the afternoon of the wedding, allowing them to warm up a bit before cutting and eating. Michelle was easy to work with, had great prices and I’ve used her for two birthday cakes since having our wedding…you know that has to speak volumes for what I think about her cakes! If you're having your wedding at Texas Old Town, or anywhere South of Austin...I would highly recommend using Michelle for your cakes. Here's a link to her site.

Another tip for future brides doing cake buffets…have extra cake stands. One of the moms only had one cake stand, but one or two of them brought two (or even three) stands. Since we ordered multiple cakes in same flavors, it was nice to be able to “stage” the cakes in the kitchen on their stands ahead of time. That way, when the German Chocolate cake was all gone out front, someone just had to run to the kitchen and grab the next one without having to worry with swapping cake stands. Just a thought for you!

Now that we’ve all admired our cake buffet…and our tummies are growling…let’s get on to the meat of cutting cakes. Did we smash cake in each other’s faces??? You’ll have to hang in there to find out!

**All photos courtesy of Christina Carroll Photography

Need to catch up? Here’s some links:
Girls’ Spa Day
Bachelor/Bachelorette Party
Setting Up the Venue…
Practice Makes Perfect…
Rehearsal Dinner
5 Minutes is All that I Need
A “Quick” Stop at the Hair Salon
A Sneak Peek at the Venue...
Arriving at the Venue...to Stay!
Getting Dressed
The Maids Pose for the Camera...
Oops - I’m Out of Order!
The Boys Smile and Say “Cheese!”
It’s Show Time!
Here Comes the Bride!
Becoming Man and Wife...
We’re Man and Wife!
Family Pictures
Now THAT’S Love!
The “Group” Says Cheese!
Now It’s Just Us...
It’s the Smallest Things...
Here Comes the Bride! And Groom!
Raise Your Glasses...

Wednesday, March 17, 2010

A Sneak Peek at the Venue...

So after figuring out what to do about my hair and J’s hair, we left the beauty shop and headed out to Texas Old Town (Redbud Hall) for a quick look around to see how everything was coming. This was probably the hardest thing that I had to do – leave things up to others. You know, others who didn’t have my vision (because I hadn’t properly shared it with anyone) and who might not do it the way that I would do things. But do you complain about angels in disguise on your wedding day? No, you do NOT. You smile, say thank you and a bask in the amazement that there are other people on the planet that can follow instructions and take charge of situations.

My mom, Maid Momma, and my MIL and SIL were such angels as these...put here on earth to help put the finishing touches on the venue so that our day would be as perfect as possible. Now, don’t get me wrong. There were a TON of other people who worked their butts off the day before, including yours truly to get as much done as possible so that all the “big stuff” was taken care of before the day of the wedding...and just the little things, finishing touches if you would prefer, were left to handle. Everyone in our family and our closest friends REALLY came through for us to make our day perfect and there will never be enough words to express our full gratitude. But I'm thinking that my Mom might get a special word of thanks for the 200+ plates that she not only carried around for a day in her car, but had to lug inside and set up...along with help from the rest of the team! But that was extra-hard work the day of the wedding that I hadn't really thought about...

So since I’ve done a few posts without ANY pictures (bad bride!) here are some shots of what I saw when I walked in...

The venue as a whole

The Bar Menu and some left-over decor

A close-up of the table signs and floral centerpieces

The sign-in table and activity books for kids

The empty cake table

The "place cards" table for seating assignments

I’ll apologize if these are all pictures that I’ve shown off before, but since it’s been a few months for both of us maybe a refresher is a good thing! I promise that the next post will have some of the photographer's pictures in them...finally!

When J and I got there, my Mom, Maid Momma and SIL were putting the finishing touches on setting out the plates and silverware and organizing the buffet area. Trying to keep J as still as possible (an impossible task, I agree!) I had her stay in the reception hall with my Mom while I unloaded my car. I had put together all of the last minute items that needed to be brought to our dressing room that we wouldn’t need in a quick sponge bath before we packed up and left the hotel. You know, things like make-up, hair stuff, activities for J in an attempt to keep her still and calm, bouquets for the girls, and bouts for the boys. You know, all that “crap” that accumulates in your house before the big day that MUST be there on the big day.

I also made sure that my dress and J’s dress were hung and ready to go...Maid Britney and MOH had steamed the last of my wrinkles out that morning and didn’t it look grand?
Didn't J's dress look so cute too? I'm pretty sure that the girls gave this one a once over too...My favorite part of my dress - to this day - the beadwork and sparkles...
Satisfied that all was well, it was time to run grab some lunch and then go back to the hotel for a quick rinse off and to pack up our stuff.

Yes, eating inside Whataburger when you’re wearing a veil is fun. LOTS of fun. More importantly, J thought that it was neat that everyone was looking at me...I thought that it was mildly annoying when people kept asking “Are you getting married today?”

Just once, I wish that I could have said the thoughts running through my head: “No. I’m not. I just like to walk around with a veil literally attached to my head. It’s fun. Really. You should try it.”


Need to catch up? Here’s some links:
Girls’ Spa Day
Bachelor/Bachelorette Party
Setting Up the Venue…
Practice Makes Perfect…
Rehearsal Dinner
5 Minutes is All that I Need
A “Quick” Stop at the Hair Salon

Wednesday, January 20, 2010

Rehearsal Dinner

So I’m a really bad bride. I have not ONE single picture from our rehearsal dinner...yeah, I’m flogging myself you don’t have to do it for me. I’m sure that there are pictures out there from family and friends, but I don’t have any of them that I know of...so we’ll do the best that we can.
Since the rehearsal itself went off without even the slightest of problems, you had to know something was coming sooner or later, right? Getting to the rehearsal dinner is where we ran into problems.

And here’s some words of advice that I can offer future brides: Don’t trust the map that you pull off of a restaurant’s website. Look at it closely, if you’re familiar with the area, and make sure that everything is right. My new map was NOT correct, and two cars ended up getting “lost” in San Marcos.

I went to the Johnny Carino’s website and pulled directions that they gave me, so I didn’t think to double check anything. Unfortunately, their directions had people exiting two exits too soon, and from there the rest of the directions led them nowhere. Luckily, most of the guests lived in or around the San Marcos area and were at least a little familiar with where the restaurant was in town. Unluckily, it was my Mom that got the most lost! They found their way eventually, but I felt SO bad about the map being wrong.

So double check, even triple check, directions that you get from someone else for accuracy, especially if you pull them off of the internet!

After that little snafu, the dinner went off without a hitch. The food was great, the drinks flowed, and conversation filled the room. We laughed and joked and just relaxed together on our last night before getting married. Right at the end of dinner, B’s dad got up and made a toast to us...I wish that I could remember exactly what he said because it was so sweet! He actually got a little choked up on it, and ended up shortening it quite a bit from what he intended to say...we didn’t care though, it felt so good to be surrounded by so much love! After that toast, we got up and thanked everyone for being there and being in our lives supporting us in our marriage and we proceeded to pass out some gifts.

My girls got their gifts and ooohed and aaahed appropriately, and B passed out his gifts to the guys. We only had one parent gift to give out, and that was to B’s parents for hosting the rehearsal dinner. If you remember from here, we had intended to pay half of the cost ourselves, but in the end they wouldn’t hear of it. So in return, we got them tickets to the last home UT football game against Kansas. They were thrilled and so touched by our thoughtfulness and they really appreciated our gift. (I know because we watched the game that they were at and B’s dad texted us every 5 minutes to see if we could see them on TV!) They had a blast at the game, and we were glad to give them something that they enjoyed SO much!

After the gifts were given, it was time to go. B and I took a few moments alone to say our goodbyes...it was the last time that I would see him until the ceremony the next day...and I’m really glad that we took the time to have a moment with just us. The whole day had been spent running around and being in a big group, so it was nice to have 5 minutes alone.

Once back at the hotel, the girls and I had some more work to do, but with all three Maids helping and my wonderful Mom pitching in as well, it all got done within the hour and we headed off to bed. After the stress of the day, I needed a bubble bath to help me relax (and to help with those cramps!) so I made sure to take advantage of the time that I had and relaxed for a bit. I fell into a deep sleep, dreaming of how tomorrow would unfold...

Need to catch up? See how I got here...

Girls’ Spa Day
Bachelorette/Bachelor Party
Setting up the Venue
Practice Makes Perfect

Monday, December 28, 2009

Setting up the Venue...

I woke up a little earlier than I had intended to on Friday morning. I was anxious to make sure that everything would get done in the four hour window that we had to work with at the venue and I was kinda hungry. Not wanting to wake up and rush MOH or Maid Britney, I tried to sneak off to the breakfast room at our hotel quietly. I didn’t manage to do it, but it’s the thought that counts, right? I left them to get ready and I headed off for the lobby, following my nose...

I found not only a waffle machine with make-your-own waffle batter, but I found my Mom and our BM all enjoying breakfast, coffee or a newspaper – take your pick. We all fixed our plates, started chattering away and settled down to eat. I was kind of worried about eating, not really sure why, but I was. Turns out that I didn’t have a thing to worry about, I polished off my plate with ease...

Once we were done eating, my Mom and I headed to the room to find the other girls and get to work. We had scheduled to be at the venue at noon for set-up and we needed to make sure that the flowers got arranged, the rose petals got packed into their packets and lots of other little tasks needed to be done before noon rolled around.

For all the madness that I thought that it might be, things really went smoothly. Maid Britney and my Mom got down to business mixing the rose petals and stuffing the petal bags...they set up an assembly line and got the process done really fast. While they did that, MOH and I started working on the artificial flowers and Mason jar arrangements. I had some fresh flowers to mix in with the artificial ones, and each table needed three Mason jars of various sizes put all together. Luckily, I had worked ahead of time and prepped the Mason jars by putting floral foam and moss all in there ahead of time.

At least I thought I was being smart. It turned out that we had to take some of my prep work apart and start over, but I couldn’t have known that before we got down to business anyway, right? So I didn’t let it bother me. We worked and worked, snipping off buds and leaves and stems...placing the flowers in the jars and working up combinations so that each one was kind of unique all on it’s own. At some point, my stepdad came in to be the muscles of this operation and we put him to work cutting the long stems off of the artificial stems. He thought he was getting an easy job, but truthfully some of those were pretty hard to snip! We were happy to have the helping hand, and it made our work get done that much faster.

Before I knew it, the petal bags were all done, and Mom and Maid Britney started helping us with the remaining flowers. Then, almost as soon as we started, we were done. I looked up in a panic at the clock to see how late we were running...imagine my surprise when the clock showed only 10 o’clock! Yes! We were AHEAD of schedule...and ready to go. We loaded up the boxes and supplies that we would need to take with us from the hotel to the venue and started getting ready to go. Before we left, Maid Britney gave me her lingerie shower gift (which had gotten packed in her suitcase since when she packed the girls hadn’t decided on the final schedule for the day yet) and we had a few minutes for me to “model” my new wares...
Once the cheese-fest was over, we loaded up the cars and caravanned over to my house. Once there, we made short work of the remaining items that needed to be loaded and taken to the venue and got the boys up and about and moving along with their list of things to do as well.
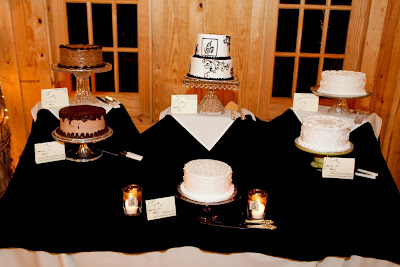
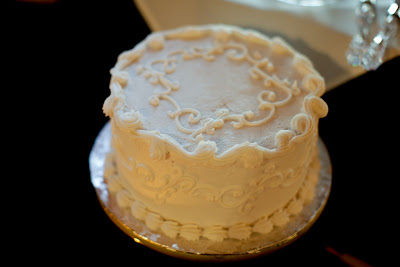
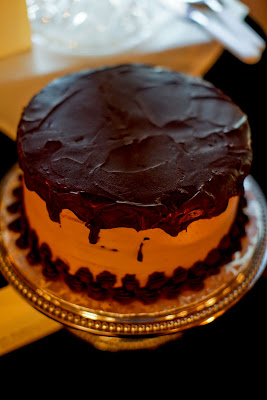
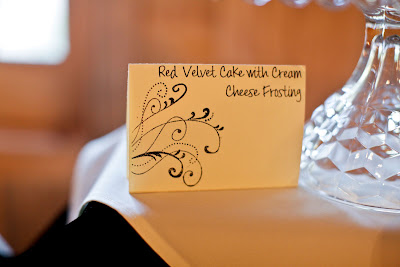
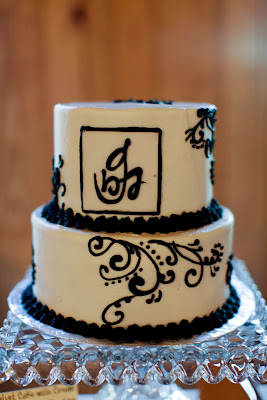
When we got to the venue, MOH, Maid Britney and I all grabbed some boxes and walked into the hall. It was as I remembered it - totally rustic and gorgeous! I got a little shiver of excitement going down my spine in anticipation of the upcoming days ahead. The girls were a little dismayed to find that we had to set up all tables and chairs...the venue was literally a blank slate...but once we got the truck and car unloaded and got down to work, we had all the tables pulled out, set up and started to place in their right positions by the time that the first of the guys showed up. B’s dad came to bring me some smaller folding tables that they had for the cake table, gift table, etc. and my Mom and stepdad arrived with their carload as well.

Before I knew it, we were spreading tablecloths, placing chairs, setting up centerpieces...and really decorating. It was all coming together and it looked so good. We had LOTS of helping hands, for which I am grateful, and when the guys got there with their crew about an hour and a half later, we had even more hands. I was really kind of worried about handling all of this on our own (no DOC or wedding coordinator fit into our budget) but it really went smoothly. It just goes to show what having a great group of friends and family wanting to help make your special day go smoothly can do for you.

Now, I won’t lie. It was VERY difficult for me to be the only person that really knew what was going on. Bless his heart, B tried to help direct people, but he really didn’t know exactly how I pictured things in my head and was pretty much just tackling the tasks that had been “assigned” to him. So every single person that was there to help us set up needed direction on what to do, where to put things, how things were supposed to look...and they all needed it from me. At times it was overwhelming. I got a bit frazzled the closer to 4 o’clock we got as I was trying to finish up everything, with someone calling out my name, needing my attention every two minutes. I really, really, really wanted it all done that day so that no one had much to do the next morning. Especially since I would be tied up and not available to direct!

I also didn’t feel good. Like I mentioned before, Aunt Flo was there with me in full force and I was popping Midol left and right. I don’t always have bad cramps, but don’t you know, this month was one of the months that I was going to be in pain...and I was. Which probably didn’t help my short fuse. I tried REALLY hard not to be all Bridezilla and not to bite anyone’s head off, but I’m sure that I was still short a time or two. Or forty. J I meant to do better, that’s what counts, right?

All in all, I had several creative people there with me helping that could take a little bit of direction and run with it. When they were done, I was consulted, made my suggestions for improvement, and they went back to work...in the end, having those hard workers there by my side putting it all together along with me made it all happen. When we left, the hall looked SO nice...and the ceremony site was almost done too...and all the extra stuff had been stored away out of sight...and all the trash and mess that we made had been picked up. It was truly amazing to see.

Oh you want to see what we saw? Allright, twist my arm...
An overall view...the guest tables
Our head tables...
Some close ups of our centerpieces...
The Cake Table
The Bar Area
The Sign In Table...Along with Kid's Activity Books
The Seating Chart Area
Not to mention that we did it all and only stayed over our limit by about twenty minutes. Not bad, if you ask me! Once we left the venue, we all went in twenty different directions...my Mom and stepdad went to pick up J from school and then to get the plates that we rented. B’s parents went to pick up T from his school. They were each responsible for getting the child that they were in charge of cleaned up and ready for rehearsal on time. The girls and I left to go back to the hotel to get ready and the boys had left to do the same at our house a little earlier. And B left to meet his brother at the other rental place where we rented the ceremony chairs to pick them up and get them back to the venue.

We had rehearsal scheduled to start at 6pm...and about an hour and a half to get cleaned up and ready before it started.

Need to catch up? See how I got here...

Girls’ Spa Day
Bachelorette/Bachelor Party

Saturday, November 21, 2009

Gifts for the Girls!

I know, I know. I’m SUCH a tease! I wrote here and here about the guys’ gifts...but kept the girls’ gifts under lock and key. That’s because all three of them read my blog almost daily and I really wanted their gifts to be a big surprise to them. In the end, MOH knew about part of the gifts, and the others had sneaking suspicions about other parts of the gifts...but no one but me had the “bigger picture” and I loved keeping this as a surprise for them!

I knew all along that I wanted their gifts to be something special that I had made. You might have noticed that I tend to be anal-retentive and obsessive-compulsive at times about the details, but that really just makes me a better crafter. So I set my task to thinking up what I could make for these special ladies.

Here’s some pics from Maid Momma of the total package. I’ll show off the gifts first and then talk about some of the details, ok?
Didn’t she made it all look so pretty? She did a GREAT job taking those shots. The one bad thing? You almost can’t see the tote bag that I made them...hers was made in a deep, dark denim and it blends totally with her dark wooden dining room table (where I know that she took these!). So here are some pictures from Maid Britney of her bag that you can see better. Do you like them? Oh yeah...well, don’t forget to sign up at my etsy store...you just might find bags like that there, hint, hint!

So back to my post...I knew that I wanted to make them something, and I had bought this bag a long time ago that I loved. It was the perfect size – not too big, not too small and it carried everything wedding-related around for almost a year for me. It was great. Knowing my girls like I do, I know that they’re bag people. Two of them have a new bag of some type almost every time that I see them, so this was the perfect solution. I would take my favorite bag, make a pattern loosely based on it, and make them all bags.

But since I wanted their bags to compliment who they are and their own personalities, each bag was different. Maid Momma got a snazzy dark denim with a happy yellow flower lining...Maid Britney got the beautiful brown/blue/gold floral with a pop of color in the blue satin lining...and MOH got her personal favorite black and white toile with a POP of hot pink satin patterned lining. Sorry, it’s the only one that I don’t have a picture of...but here’s a shot of the fabric used to make it.

The totes have multiple pockets on the outside...and then I put in a zipper pocket on the inside of the lining. Each outer pocket is also lined with the inner lining, so there are pops of color everywhere you look. I loved each and every one of them.

But the fun didn’t stop there. I also made them personalize note cards. I asked each of them for their favorite color, and then found a Photoshop brush online and designed cards for all of them. I put them with envelopes and tied them off with pretty ribbon left over from various other projects.
Then just because I love bath stuff, I also asked them for their two favorite scents from Bath & Body Works. I got each of them some combination of bubble bath, shower gel and/or body lotion. I also gifted each of them with the earrings and necklace to wear at the wedding. Since they had each picked a different LBD to wear as their dress, we decided that matching shoes and jewelry would tie them all back in together nicely. MOH helped me pick out the jewelry the week before the wedding, so she knew about that one, but oh well. She didn’t know about the rest! LOL.

So that’s it. That was my big surprise for my Maids. I think that they were all VERY happy with my selections for each of them, and looking back, I’m thrilled that they each got something that I worked so hard on. It was the perfect gift for these girls who worked SO hard to help make our day spectacular!

Tuesday, November 17, 2009

Thank You Notes...

They’re done! Whew! That feels good to write. Seriously, it does. You cannot as a bride-to-be imagine or fathom the amount of thank you notes there are to write after the wedding is over. Seriously, you can’t. Trust me. But there are a lot.
I had set a goal in my mind that I wanted to try to have them all out before we left on our honeymoon. That might seems unreasonable to some, but remember that we had 10 days between wedding day and when we were set to leave on our honeymoon. And once I found out that B fully intended to help with this task, I put him to work on his fair share of thank you notes to write!

I’d like to say that they ALL got done before we left. But I’d be a liar. What I can say is that MOST of them got done before we left. And most of them were mailed the day that we left, which is good too. I would hate to have finished them off and then left them at home awaiting postage while we were gone. And I guess since we did stamp them and post them on a VERY busy day, I was relieved to only have one come back to me missing postage. Must have been stuck to the one in front of it – Oops!

But that straggler is on it’s way today, along with the ones that I didn’t finish before we left. Some brides might choose to go the route of writing the hardest ones first to get them out of the way, right? Not this bride. I saved those special ones for the end...knowing that there was more that I wanted to say than I was capable of saying right away. But luckily for me, those last few were the ones to my best gals and my mom...and surely they’ll understand the wait. I hope so, anyway.

When I finished those last few up yesterday, I opened my wedding database to check them off as being done and I saw a name or two that I don’t think that we did. Some intangible gifts that need to still be addressed formally...the friend that rented the limo...one of the shipped gifts that didn’t come wrapped with a card...just little things like that. (Since I organized the thank you cards using the cards that came on the gifts, me missing these last two were totally understandable!) And then there are the two or three gifts that we received while out in CA helping our Best Man get married off. We weren’t expecting to receive more gifts!

So I wrapped those stragglers all up tonight, and put them in the mail drop this morning. I feel better having this all done. How about you? Did you feel a sense of relief once this task was finished? Did you drag your feet getting it done? Or attack them aggressively in order to have them off fast, like I did?

Thursday, November 5, 2009

Table Signs

I think that I’ve said this a lot in recent posts...but I’m going to risk sounding like a broken record and say it one more time: making the table signs was a fast, and easy project!


Seriously, it was! And they turned out great. Just another example that as a bride you don’t have to make things harder than they have to be...you don’t need expensive things for the final outcome to turn out beautifully. And if you stay tuned through the whole post...there MIGHT be another sneak peek photo at the end...I’m just saying!

So we left off here where we had our table names. Do you want to take a guess at how I made the signs? If you guessed using text boxes in a Word document, you’d be right! I designed and printed them out on my home computer, simply using the same font that was on our other paper products and the same Stardream paper that was used for all other projects as well. What was new this time? The dowel rods.

Yep, you read that right. We used dowel rods for our table sign holders. That was B’s genius idea that he came up with one day while trolling through Hobby Lobby looking for inspiration on how to display our table names. I mean, we’d worked long and hard to pick them all out...we wanted to be sure that they were displayed properly! It was B that suggested the dowel rods, me that suggested painting them black to match better, and both of us that realized that we needed no base to anchor them to – they could simply be inserted into our Mason jars of flowers that made up our centerpieces.

I printed all of the signs out one night – two signs of each for front and back – and cut them all down to size the next evening. During the day while I was at work, B took my extra spray paint leftover from this project and spray painted them all black. Then I came home and “nicely” asked him to put another coat on them. I say “nicely” because at this point we were 5 days out from the wedding and there were lots of “nice” requests being made at once! LOL. I tried to be nice, I really did! B had to make a quick trip to the store for more paint – they were only lightly painted due to a lack of spray paint. Once I came home the next day, they were all finished and beautiful.

Here are the materials that we used on this project:
Printed and trimmed down signs
¼” dowel rods, cut in half and painted
Double-sided tape (a bride’s best friend!)
Glue Lines – just like Glue Dots, but in lines (they were left overs from our Save the Dates)

So our only purchase ended up being the dowel rods. Sweet!

I put double-sided tape on one back of one sign. Then carefully placed the matching other side right on top.
(At this point, if it was off a little, I did NOT go back and trim them! I did trim one that was WAY off...)

Next, I carefully applied two Glue Lines to the end of a dowel rod. It didn’t matter which end, as neither would be shown. This was a little tricky. The Glue Lines didn’t want to peel off of their protective sheet and stay on the dowel rods...and they’re SUPER sticky if you start using your fingers. Just a word of warning.

Once they were in place, B held the sign front and back slightly apart and guided me into the center of each sign. After gently placing the rod in between the sheets, I gave each sign a little extra pat on the outside to ensure that the Glue Lines caught the paper.

In the end, this is what we were left with... And, since I promised earlier...this is how they looked in each centerpiece.Aren’t the gorgeous?!?! Luckily for me, the font was big enough (or our venue small enough) that I ended up not printing out a “map” where the escort cards were set up. Once we had all the tables in place, I realized that it would be possible to see each table name – the hall just wasn’t that big. And with only 12 tables to look through, it just wasn’t worth the effort it would have taken me to make the “map.” In the end, with the bridal party tables pulled out and placed on the stage, there were only 12 tables to set up for guest seating...which made assigned seating just a little bit easier for us.

So how do you like that? A project that cost less than $3...with a big punch. We loved them.

Tuesday, November 3, 2009

Making the Cookie/Favor Bags...

These turned out to be a great project that I did in several stages. I liked the overall finished product, and changing my idea mid-stream ended up helping me tons in the end! Here’s what I did.

From the get-go we knew that we were not doing traditional favors. We knew that we would make a donation to the American Cancer Society, but wanting to give our guests something small to take home, we opted for homemade cookies. I shared that recipe with you here. And since I had SO many glassine bags left over from purchasing them for the rose petals project, I decided that those bags would make perfect cookie bags as well.

When I printed out our invitations several months ago (I think that it was August) a piece of what was printed at that time as our favor tag. I took some suggestions and ideas from the www and had our blurb explaining about our favor choice printed alongside our invitation items in order to get the most print out of my paper goods. Smart, huh? So those have been printed for a while now. While I had MOH here back in August helping me assemble the invitation suite, she also helped me cut those out and mount them on plain black cardstock. Even though they were printed on very pretty, sparkly Stardream paper...they lacked a little something when placed against a glassine bag. Mounting them on the black cardstock was a perfect solution...and since I had so much of it leftover too, it made perfect sense to use it here.

I left the stack of favor cards on the coffee table one day with instructions for B to punch holes in them all, pretty please. (This was like two weeks after they were all cut and mounted.)

Then they just sat there for two months. Hee hee.

Two weeks before the wedding, I spent a weekend baking all of our cookies for our favors. It was while I was doing that task when the brainstorm hit me. It was like a lightning bolt...and I had this idea: if you’re pre-making all the petal bags, closed at the top and open on the bottom to stuff the rose petals in at the last minute and then glue closed...why not do the same thing with the cookie bags?

Genius I tell you! I posted about the process in detail here, but didn't take any pictures...so here's the pictures. (Click back to the post for better instructions.)

This is what I started with:
See how the bottoms are closed already?
So I cut all the bottoms off... Folded them over...and cut out the part to glue them closed. (Sorry, no picture of that step!)

Then, I folded the tops of the bags down...
And used my bone folder to make the crease nice...And had B punch a hold in the center. Through that hole, I threaded a length of twin (used in our other projects also) and tied a knot just like I did for the escort cards/name tags. See how this is all “tying” together?!? Then pulling the twine through the other side, I simply tied a square knot to keep the bag closed.
I came across a post that Mrs. Beagle did on her cookie favors, worrying about whether the cookies would “grease” the insides of her bags, so I cut a small rectangle of freezer/butcher paper and inserted one into every bag. All of this was done BEFORE we were ready to put the cookies into the bags, so they were ready to go - just missing cookies and glue to close them!

The night before the wedding, after the cookies had spent all afternoon thawing, my Maids and I made two assembly lines with one person stuffing the cookies into the bags while another person glued them closed. Easy, peasy...We were literally done with all 140 bags in less than an hour. (Well, except for the last bag of cookies that got left in the freezer! But those were done lickety-split the next morning.)

Smart, huh? And they turned out SO cute! Here’s a picture of the final result for you...

Did you have an idea like that where you were able to “re-use” the idea over and over again? I had several...and I have to say that doing the rose petal bags and the cookies were a breeze this way the day before the wedding!