Showing posts with label artificial wedding flowers. Show all posts

Monday, May 3, 2010

It’s the Smallest Things...

…that make your wedding day perfect. I thought before I got to the reception pictures that I would share with you the up close and detail shots that our photographer, Christina Carroll, got of the décor around the reception hall.

These were all the projects that I sweat and slaved over...pouring all of my creativity and craftiness into making...and it was SO special to me that she got pictures of it all. To me, these are the things that made our wedding about US...they’re what made our wedding stand out and be special in our minds and in other’s minds.

Hope you enjoy!

Our programs – laying in their basket...the basket that I bought on sale, spray painted and made the liner for…
And a close-up on one of the programs all opened up...
Our Mason jar drinking glasses, which I painstakingly used as escort/seating cards...I printed them all out, stamped them, embossed them, mounted them and then tied them on...lots of work – but SO worth the effort!
And a special shot of my glass...this is the last time that you’ll see it empty!
Our favors...snickerdoodle cookies that I made from scratch...along with the labels explaining about our charitable donation...my Maids and Mom helped me stuff all of those cookies and seal all the bags. So much hard work, and SO yummy!
The main table that guests saw when they walked into the reception hall...all decorated with our signing book and kids activity books.
A close up of the activity books...
And some shots of the quilt-piece “signature book” layout...an update on how that quilt is coming soon, I promise!
And now for the table arrangements...our bridal table...
Our bridal party centerpieces...recognize those bouquets?
And our guest tables...
Like I said before...all of these elements added together make your wedding your own. Was it a pain in the butt to work on all of this stuff? Sure it was. But I enjoyed most of it. And to me, the end result was MORE than worth it! Our wedding was exactly as I had envisioned it...rustic elegance...and it was all of these small details that helped make it that way! And, Mom/MOH, you HAVE to admit that those EGGGPLANT tablecloths really MADE the room!!! LOL!!! It was worth all the time that it took to find them, huh? ;)

**All photos courtesy of Christina Carroll Photography

Need to catch up? Here’s some links:
Girls’ Spa Day
Bachelor/Bachelorette Party
Setting Up the Venue…
Practice Makes Perfect…
Rehearsal Dinner
5 Minutes is All that I Need
A “Quick” Stop at the Hair Salon
A Sneak Peek at the Venue...
Arriving at the Venue...to Stay!
Getting Dressed
The Maids Pose for the Camera...
Oops - I’m Out of Order!
The Boys Smile and Say “Cheese!”
It’s Show Time!
Here Comes the Bride!
Becoming Man and Wife...
We’re Man and Wife!
Family Pictures
Now THAT’S Love!
The “Group” Says Cheese!
Now It’s Just Us...

Monday, October 19, 2009

The Great Flower Saga, the Conclusion

So with the Boys' bouts assembled and ready, and with further fortification in the form of food and wine, we went back to the bouquets for the Maids. (If you need to catch up, click here.)

We picked the flowers back up and I was honest with MOH about the pink and cream peonies. I just loved them too much to take them out! And having the solid cream peonies is the only thing that linked their bouquets with my own. I wanted something similar, but not exact. Being honest with myself and MOH about what I really wanted helped us focus our efforts on keeping the peonies (both of them) in the bouquet. This was one time that I couldn’t just say “yeah, that’s cute” in a non-committal tone when I didn’t really mean it, you know? And since MOH would be one of the girls carrying the bouquet, she couldn’t fudge the truth either.

We decided that what was throwing it off was all of the “other” flowers in the bouquet. So we took everything away except for the peonies.

MOH like the idea of carrying a single peony. The buds were Ginormous, which is what gave her the idea...

But I thought that they looked too skimpy. Two peonies together wasn’t enough either. Three tied off together was better...but not quite there still...six together was the perfect size, but the organization was just "off"...
And suddenly, without any effort (on my part!) at all, the image I had in my head shifted and changed and what MOH held in her hands was perfect! I loved it. It was full and not skimpy at all, but still smaller than my bouquet, which made MOH happy. It complimented my bouquet with the shades of ivory, but was unique on it’s own with the hot pink. Love it, love it, love it.

Oh, what was that? You want to see a picture? Oh, OK, but only because you said pretty please!

What do you think? I think that the big greenery leaves that we scavenged from other poor flowers that didn't need them anymore is what made the difference for me... Here’s a picture of my bouquet along with two of the Maids’ bouquets just sitting in vases so you can see them all together. (The bouquet looks really full there but keep in mind that there are two in the one vase. And in real life, they ARE actually smaller than my own bouquet, I promise!) Man - that is one MESSY table, huh? I'm sorry for the mess...you should have seen the floor...LOL!

In the end, keeping it simple worked the best for us. It wasn’t what I envisioned, but I loved it. And I showed them off to my Maids the other day via email and the consensus was that they love them too! Which is good, because it’s what they’ve got whether they like them or not...hee hee!

I’m so tough! Not really. So now, I just need to decide about the parental units and I’m done with flowers for the wedding. I’ve got a box of cut flower stems waiting to be arranged into centerpieces and I used the last of my credit with our supplier to get some last minute filler flowers...and wouldn’t you know – they have MORE of my bouquets! I’m SO excited! I had wanted to buy more and break them apart so that the flowers that made up my bouquet were used in some of the centerpieces, but when I went to order them last month they were all sold out! Insert sad face...but it was all better yesterday when I went to place my final order and they had them again! Score!

The rest of the flowers should be here Monday or Tuesday, just in time. And the rose petals arrive on Thursday...along with my special ordered Stargazer Lilies. I called HEB to make sure that they would still have them in stock, and the florist placed a special order just for me to come and pick up next week to ensure that I have enough. At. No. Charge. I love HEB...

Are you DIY-ing your flowers? Are you using real flowers, or are you going to be a renegade too and order artificial ones? If you are, I would highly recommend afloral.com. (Follow the links above to get to their website.) The flowers were usually a good quality (with a few exceptions), the return policy was GREAT, and they’re usually running a special where you can order enough to get free shipping. I’d love to hear about your floral experience if you’re doing them yourself...

Saturday, October 17, 2009

The Flowers that Just...Weren’t!

I’ve mentioned once or twice that the dress fitting didn’t happen last week like it was supposed to happen, and I haven’t really said anything more about it. I’m not going to now either, sorry! You’ll have to wait for the pictures! Instead of dwelling on the negatives of that day...I’d like to show you the positive progress made that day on our flowers.

You know from this post that my bouquet has been done for some time. I wanted something similar for my Maids, except using the colors of ivory and hot pink and a little smaller in size. I ordered all the supplies from here, and when they arrived I anxiously went through the box. I wasn’t really sure about some of the things that I had liked online (pictures online can look SO different in person!) so I weeded through the order and immediately sent back things that I didn’t like.

I tried to work on it on my own, but there was magic that MOH brought to the table, and it just didn’t work for me. I don’t know. I did the SAME things that she and I did once we got together to work on it, but it just wasn’t working for me. So when MOH drove into town for the dress fitting that didn’t happen, we decided to spend the evening working on flowers. After making a stop to grab a Papa Murphy’s pizza and not one, but TWO bottles of wine! We felt like we deserved it after the stress of the afternoon...

(Don’t worry – we only drank one bottle that night...I’ve still got the other one, and am saving it for the next time that all of my Maids and I get together – which is NEXT WEEK! A little butterfly just danced around in my stomach for a minute after I typed that!)

So, you’ve refreshed your memory of my bouquet right? Well, as pretty as it was, and as simple as we both remember it being to put it all together, the bouquets for my Maids just didn’t happen that way. I think that it was because with my bouquet we started with a premade bouquet that I loved, and just beefed it up a bit. OK, so that’s an understatement...we started with TWO of the bouquets that I loved so much and beefed it up a lot, but whatever. These hot pink ones just weren’t working for me.

I had bought some beautiful hot pink and ivory peonies that I still swoon at a little when I look at them...and was insistent that they be in the bouquet. But mixing in the other shade of pink roses and cream peonies that I had on hand just wasn’t working. No matter how we put the flowers together, they were just off. Either the pinks weren’t the right shade, the peonies just overwhelmed the whole bouquet...and many other complaints that we came up with that night.

So, I topped off our glasses of wine and we set that project aside for a bit. We thought that maybe if we mulled it over a little, then came back to it something would click. And since I had decided to use the peony buds for the Boys’ bouts, we thought working on a project that we could actually make progress on was more worthwhile.

While I cut the hot pizza up to serve, MOH came up with these lovelies:
Here's a close-up for you... I haven’t decided about flowers for moms and dads yet...there’s a dilemma with my family and who to honor and how to do it all, so the debate about flower bouts and corsages for moms and dads is still out...to be decided this weekend. I promise! So she made up one extra one, and moved on to B’s bout.

I loved the idea of the Boys matching my Maids...and B’s bout matching my bouquet. So that’s what we did. We had to work with it quite a bit...he’s wearing a black suit, and the flower that I was dead-set on using for his bout was a deep purple eggplant color and just wasn’t “popping” off of the suit enough. Even with greenery behind. But after a slice or two of pizza, another drink or two of wine, we came up with something that we both loved. Feast your eyes:
Isn’t it the cutest? I was worried that B would think it a bit girlie, but when he got home a little later he gave it two thumbs up too! Yea! And we held it up against a black backgroun (like his suit) and it pops plenty with the cream eva berries in there.
So I was glad that the bouts weren’t too difficult to pull together. And I can easily make some more for the dads, if that’s the route that we go.
Even though I was happy about those being done, I was really bummed about the problems that we were having with the Maids’ bouquets. Oh well, eat another slice of pizza, drink a little more wine, and your problems can resolve themselves, right? Hmmm...I’m going to be a stinker and tell you to stay tuned for the conclusion next time!

Friday, September 25, 2009

Flower Lust...

If I hadn’t already settled on a VERY limited amount of fresh flowers at our wedding, I would be ordering these babies right now!

Aren’t they perfect? And the eggplant coloring in the middle of the calla is just SO perfect! I love them. And they’re even better because their mini callas! (You know everything is SO much cuter when it comes in the mini-size!)

Be still my heart...our flowers are all done and you can’t include these too...

Tuesday, September 1, 2009

My Bouquet

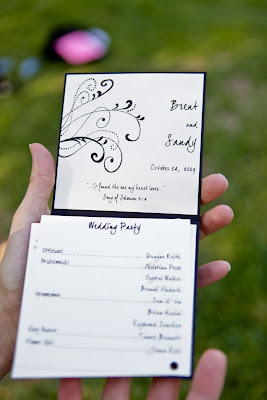
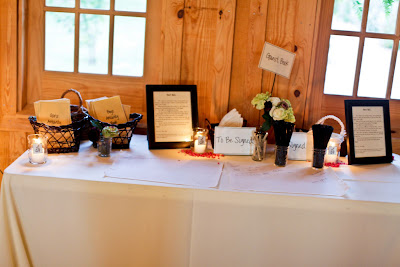
So...I've been teasing you for a week now...it's about time for me to ante up, right? I've teased you with the hard work that MOH and I did the weekend before last. This is the last post of what all we worked on that weekend, since I still can't show you the invitation suite yet.


Without further ado, I present my bouquet! Insert swoon here...isn't it lovely? Need another look? Ok, twist my arm...here you go!What's that you asked? OH! You want to see a close up of some of the flowers...well, ok, I suppose I can do that too!I think that last picture actually needed to be rotated before I posted it, but you get the idea.


So...what do you think? That bouquet is 100% artificial flowers. It has the perfect mix of wedding colors (ivory and greenery) and my own color (eggplant) with enough touches of lavendar thrown in to provide a blending of the two stark colors. I LOVE. IT. Seriously...LOVE it! I couldn't imagine a more perfect bouquet if I tired, and I've looked at about a thousand inspiration pictures so far...maybe even two thousand.


Now, I know what you're all wondering...how did I do that? How did MOH and I make the bouquet right? You want some step-by-step instructions, right? You see, that's where we run into a little snag. I don't really know how we did it. And since I thought that maybe I was just having a bridal moment of memory relapse, I asked MOH. And she didn't really know either. But I do have some before pictures...and some in action pictures...and maybe if you bear with me, you'll get some type of instruction!


Here is what we started with:


Actually, I started with two of those. I ordered ALL of the artificial flowers from afloral.com, and I would HIGHLY recommend them if you're thinking of using some artificial flowers. They have a generous return policy, and just like with the guys' ties, I ordered one flower of all of the ones that I liked and then sent back what I didn't like and re-ordered larger quantities of what I did like. As luck would have it, afloral.com was also running a special as I placed my large order offering FREE shipping on orders over a certain amount. Check them out here - they're GREAT!


Once I had received all the flowers in hand, I just put it all aside until this weekend when MOH would be here to help me. Since we were combining two of the pre-made bouquets from afloral.com, the bouquet was semi-full before we started adding more stems. We gathered the two bouquets together and then I started trimming down the individual stems while MOH worked the bouquets apart, as the stems were tightly packed togheter. Creating space between the blooms allowed us to insert the individual stems that I had fallen for...mainly lavendar roses, ivory peonies and some lilac/cream hydrangeas.


This is what the process looked like:
MOH would work in one stem and then turn it over and fluff. She would pull it apart and insert another one, being careful to hold the base of the stems firm and not let any of the stems loose. Once we got all the stems that we thought we needed in the general vicinity that we wanted, this is what we ended up with:

It was close, but not perfect. You see there around the base? There were too many of those light green hydrangea blooms all around the base. Since these weren't real flowers, the problem was easy to solve. We just pulled the buds off of some of the stems. We thought about trimming the stems down too, but then worried that we might want to add them back later, so we just worked around them and hid them in the remaining blooms.


MOH would work on it for a bit, and then I would take over for a little while. We must have swapped the bouquet back and forth about twenty times, each of finding small adjustments to make in the overall look. We made sure that one side didn't droop further than the other sides, and also that the overall shape was rounded. At times, we had to seperate some of the blooms of the pre-made bouquets to pull them "out" of the bouquet a bit and make them "taller" in the bouquet. We just passed it back and forth. And back and forth. Then, before we knew it...we both couldn't find anything to make it any better.
Starting at the base of the stems closest to the flowers, we took a 1 1/2" black satin ribbon and pinned it along the end. Without cutting the ribbon in length, we wrapped the bouquet...MOH held the bouquet in place and I worked the ribbon around tightly, inserting pins along the way down the stems. We wrapped almost to the bottom of the stems and then I came back up the stems about halfway before we cut the end and pinned it in place.

Since I hadn't thought to buy them yet, we just used regular straight pins for sewing to pin the ribbon in place. I will purchase some pearl-head pins to "polish" the look of the bouquet off, and the reason that I went halfway back up the stems was in case I re-wrapped the whole bouquet when I put the pins in and needed an extra length of ribbon. I also plan on burning/melting the end of the ribbon when I re-wrap it so that no fraying will occur.


About that time in the day, it was almost midnight, and MOH and I had been at it steadily since our cake tasting appointment at 11am that morning. MOH made the great suggestion that maybe we should set the bouquet aside until the morning and take a fresh start at the process. I agreed, and I set it in the vase you see it pictured in.


But when I came back downstairs the next morning, I was in love. Totally and completely in love. My bouquet was perfect, and needed no more adjustments. What I like most about it, is that this task is done and crossed off of my list. No last minute worries about the florist not doing something correctly, and since they're not fresh there won't be any last minute worries about messing up the flowers. And, since it won't die, I can be sure to find a place for it in our home after the wedding...as a memento of our special day.


Didn't MOH do a great job with this task? I think that she deserves a round of applause! Do you agree? What do you think about having an artificial bouquet?

Saturday, August 29, 2009

An Easy Project...

I know, I know – this isn’t really the stuff that you want to see or hear about. This is a simple (and cheap!) project that I also knocked out this weekend while MOH was here helping me...but it’s NOT any of the big projects that I had posted about getting done. Sorry. Don’t hate me. I promise that I’m working on those, so this is just a little teaser in the meantime!

I found some plain, but cute, little vases at my local Wal-Mart a few weeks ago. At $1 a piece, I thought that they would be a great buy and the perfect thing that I would need to set at various spots around our reception. You know the cake table or the signing table or the escort card table might need a little floral love...these vases were the perfect size to add some floral accents without being a big centerpiece design or too overwhelming.

The problem with them? I thought that they needed a little something more...more panache, more jazz, just more. And since this was a simple DIY project, I started on it while MOH was busy working on my invites! (I’m SUCH a slave driver!) J

Here they are before.
To jazz them up a bit, I had seen a bee on weddingbee that added some ribbon to her centerpiece vases that added just enough of a touch of elegance to them that I was going to work off of. She had added a ribbon going all the way around the vase, and then crafted a bow to polish the look off. I found some ribbon that was a little sparkly organza in a black that was perfect for this the week before while shopping on Harry Hines Blvd in Dallas, TX.

First I measure off the length of ribbon that I would need. Then I cut 12 strips of ribbon.
I pulled out my handy hot glue gun and warmed it up. While it was warming up, I asked MOH for her opinion on bow or no bow...and she came up with an idea that was quite brilliant. Since she had been spending most of her weekend becoming “one” with the invitation suite, she immediately suggested that I use our monogram piece to jazz up the vase a little bit. I hadn’t even considered that as an option, so I set out trying it out.

But first I had to get the ribbon secured around the vase. I probably could have just used double-sided tape or something here, but I like the hot glue gun and it’s been feeling a little neglected since I finished all of my pomander projects. LOL.

One thing that I have seen is a bride making a template of sorts so that all the ribbons fall at the same height on the vases. Can you guess if I did that or not? Come on, take a guess...

If you guessed that I did, you would be...WRONG! Yep, you read that right folks. I can be anal-retentive with a touch of obsessive compulsiveness thrown in there for good measure about certain things be absolutely perfect (ahem, the invitations, cough) but this wasn’t one of them. Maybe I was fresh out of obsessiveness that day...but it also helps that these won’t be side by side. It would take a pretty discerning guest to compare these and see that they weren’t perfectly the same.

So a little dab of hot glue directly on the vase...in the general vicinity of where I thought it needed to go...Attach one end of the ribbon and press down so that the glue comes through the sheer material... And then wrap the ribbon around and press to the glue spot again to secure. After I let them dry for a minute, this is what I had. Following MOH’s suggestion, I taped a monogram to the ribbon to test the waters with it. I love that using the monogram would give me another opportunity to use it, as both B and I love it to death. And I think that the monogram gives the vase a very polished look, don’t you think?See for yourself. All in all, I’m happy with the final result. I’ve got to make some more of the monograms, and for the final product, I’ll use hot glue to attach the monogram as well...I don’t want to worry about tape coming unstuck. This was a cheap project that was finished in record time...a whopping 10 minutes. And all because I didn’t feel the need to measure them off! Just kidding.

Here’s a cost breakdown:
12 vases from Wal-Mart - $12.99
25 yard spool of organza ribbon - $3.24
Hot glue gun and sticks – leftovers from other projects
Monograms – leftovers from invitation suite
Total cost – $16.23

Making each vase a whopping $1.35!!! Yea for cheap and fast projects. In fact, these were so easy and simple that if I decide that I need some more vases to place around the reception venue, this would be a great choice. And I can easily fill them with leftover flowers from my centerpiece arrangements.

Did you have a project turn out so well for you? Not just how easy it was to complete, but also in terms of being budget-friendly? I’m curious to hear about it!

All images taken by me...and let me just mention now how HARD it is to do DIY projects with one hand while holding and focusing a camera with the other hand!

Monday, August 24, 2009

In Lust...


I haven’t posted about this particular project yet, but I couldn’t resist sharing some eye candy with you! I opened up my Google reader this morning and look what awaited me...


Isn’t that DIVINE?!?!? It’s breath-takingly gorgeous! If I wasn’t already deeply and madly in love with my own bouquet...I would probably try to find exact replicas of those flowers and re-create that bouquet. Or something like that bouquet.

Love it. Love it. Love it.

Sunday, August 9, 2009

Anyone Heard of This Stuff?


It’s called Aquagems, and apparently, you soak it in water for 6 hours and it turns into this stuff.

The website that I found this stuff on, here, says that it can be used in flower arrangements. It stores, and then releases water to plants that need it. I wrote here about looking for something that would fill the bottom of my centerpiece vases...wonder if this could be it? I was thinking a nice green color...but the onyx kinda looks cool.

Has anyone out there ever heard of or used this stuff? I’m wondering how good it looks in person, and am leery of spending $7 to find out...then again, it’s only $7, right?

Wednesday, July 1, 2009

Re-Visiting My Floral Budget

Oh, what a girl will pay to get what she wants…

Yep, I’m looking at our budget. I’m constantly working on ways to save a little here and there without compromising the overall feel that we want to encompass for our wedding. I also don’t want to skimp on quality too much, either. I may be a “budget friendly” bride, but I’m not a cheap bride! This coming from the girl who spent countless hours making flowers out of TISSUE PAPER…LOL!

In the interest of our budget, I’ve been looking at our floral budget quite a bit. Our wedding budget calculator tells me that my floral expense should be $1500. At first, this seemed like a lot to me, to be perfectly honest. Then I started shopping for flowers online and seeing what my options are. And since I’m one of those stubborn brides who wants what she wants no matter what time of year I’m actually getting married…yeah, that just complicates things.

I mean, if I was getting married right now (let’s just pretend) then I would be able to go down to HEB (my local grocery store) and pick up a dozen nice looking roses for about $10, including tax. I actually think that they’re on sale this week for $7.99 plus tax. CHEAP! And those Stargazer lilies that I have to have at the wedding are selling for $4/stem right now, with 3-4 buds on each stem. NICE. Buying locally would save me a LOT on my floral budget.

But here’s the thing. I’m not getting married right now. I’m getting married towards the end of October. Hmmm…so will these flowers still be available then? I don’t know. So I’ve been researching other options - mainly ordering my flowers in bulk online.

There are several resources that I’ve found for this type of service. Apparently it’s a hit thing to do now (DIY-ing your own flowers) and there are several websites that cater to the bride that chooses this option. The flowers come from all over the world, allowing these vendors to sell their goods year-round. This means (and I checked carefully!) that I can get fresh roses and lilies at any time during the year. I might be limited on some color selection as far as the roses go, but that should be it.

This color limitation brings in another option – artificial flowers – since I have to also have lavender flowers. I know that I’ve posted in the past about this seller that I’ve found that offers some pretty amazing fake flowers. Some of them aren’t so great, but that’s why you buy just one stem of each ahead of time and then you can pick and choose what works best. Incorporating some artificial flowers into my décor will allow me to have some of the colors that I want or out-of-season flowers at a fraction of the cost that I would pay to get them there fresh. Because I’m sure that peonies in October would cost an arm and a leg, IF you could even get them.

So yesterday, I’m crunching numbers on doing a mix of fake and real flowers, trying to see where I stand on my budget. The good news? Even if I paid top price for everything, and ordered WAY more than I think I’ll actually need, I can get all the flowers for around $800. So, as long as I can get the moss, floral foam and various other floral supplies that I need for around $200 that would bring my total to about $1,000 – which is $500 LESS than what the budget calculator tells me to allow for.

This is GREAT! I share the news with Mr. CC the other night in my excitement, and he thinks that spending $1,000 on flowers is a little steep. I explain that it’s actually only 2/3 of the budget that I’m supposed to be spending and he gets a little more on board with my excitement. I guess that not sharing the hours and hours of research on this that I’ve done online does have its drawbacks…

But I get his point too. Since I had to go to HEB that night anyway, picking up stuff for dinner I went through their floral shop looking for the specific flowers that I’ve come closer to deciding that I want in my wedding. Here’s the breakdown:

Online HEB
Roses (125 – 16”) $172.05 $10/doz=$110
Stargazer Lilies (40 stems) $172.05 $4/stem=$160

That’s not as bad as I was thinking the difference would be. I was actually expecting a LOT more – of course I haven’t factored in shipping either. The only other “fresh” flower that I’m buying online will be the rose petals that I want to line the aisle with. I’m still working out exactly how many of those that I need…but they should be less than $300 at the MOST.

But the thing that I just realized? I don’t NEED 40 stems of lilies….I only need 10 stems to give me the buds that I need for my centerpieces, which would also leave me with extras. But 40 stems is the least amount that I can buy through the place that I liked best online.

I guess the search goes on…surely someone out there can sell me only 10 stems of lilies?!?!? In the meantime, I think that I’ll stop and talk with the florist next time I’m at HEB. I mean, who knows, maybe they can get me stargazer lilies in October…as Mama CC always told me growing up – you never know until you ask!

Friday, June 26, 2009

A Perfect Tie In...

I think that I’ve come up with a way to bring all of my reception colors into the ceremony. Tell me what you think about this…

Just in case you need a refresher, here’s a picture of my bouquet:


I’ve actually ordered another bouquet to help make it more the size that I’m looking for in my bridal bouquet and will “fluff” the bouquet with some of these lovelies…

…and then add in fresh cream roses to complete the bouquet and add some real scent to it.

That totally goes along with my color scheme…from the cream tissue paper pomanders, to the lavender poms hanging from the shepherd’s hook, while also including the mixture of eggplant, lavender and cream rose petals lining the aisle. And now you know that it also brings in the eggplant on my shoes (which won’t be visible during the ceremony but I will know that they’re there!).

Having picked such a fun and funky shoes really opened the door to the creativity block that I was suffering from in regards to my Maids’ bouquets. But those shoes solved everything…actually those little hot pink dots solved it all.

I think that I will have my Maids carry a bouquet in the colors of hot pink, light pink and cream flowers. That will tie in perfectly with the rest of my planning, don’t you think?!?! It’s perfect!

Here’s what I’ve found so far…

A hot pink and cream hydrangea…

Light pink roses…

Eva cream and pink berries (to add a different texture to the bouquet-which mimics my own green berries!)…

And then supplement the bouquet with fresh cream roses (like will be in my own bouquet) and possibly a stargazer lily or two thrown in for that splash of big color…

What do you think? Do you agree with me that it’s perfect for what I’m trying to accomplish? I think that if all bouquets are wrapped in black satin ribbon, held with either rhinestone or pearl pins, it will tie everything together SO nicely.

That would leave me being original with the purple hues all being in my bouquet, and the pinks all being in their bouquets.

I need to see them together to make my final decision – I’m SURE that we’ve discussed in detail before how difficult it is for me to picture things in my head sometimes. I've ordered samples of all of the pink hued flowers shown above so that I can see the quality before I settle on this idea. There’s a lot of green to my bouquet, but I’m hoping that adding the cream and lavender roses to my bouquet will tone that down quite a bit. Do you agree?

Can you picture this better than I can? I think that it’s a perfect compliment to our shoes…and I LOVE how the eggplant and hot pink work together on those shoes!

Wednesday, June 24, 2009

A Home Run Idea?!?!

After all of the re-caps from last week’s shopping trip, I feel like I’ve just been a brainstorming machine over here lately! That’s not actually true, some things have been “stewing” on my “cooktop” but have needed to think about them a little more.

So now, after making some decisions regarding the bridal party attire – WooHoo to us! – I can move forward with some other things that I’ve been thinking of. One of the main topics of focus for me right now is those darn centerpieces. And now that I have these fabulous shoes decking out the entire girl-side of the wedding party, I have my hot pink thrown back into my color mix. Which makes bringing those Stargazer Lilies that Mr. CC loves so much back into the mix a LOT easier.

I know that I posted here about an idea to use a plant seated into the vase with little flowers inserted into the plant. This would bring the cost down on my floral budget, while also allowing me to DIY a lot of the project. But finding what I had pictured in my mind turned out to be harder than I thought. I think that was partly because I wasn’t totally sold on the idea.

Back to square one. Where should you start looking when you’re fresh out of ideas? Well, an obvious choice would be the internet. But I took the road less traveled and pulled out my bridal book. What’s that? Oh, my BRIDAL book, that large three-ring binder that I’ve been lugging around with me, storing snippets of information in each time I see something that I like. Yeah, that book. You mean to tell me that it can be used for things other than just storage? No way.

Apparently so. I took a break from a massive job-role mapping project that I was working on at work the other day, and pulled out my trusty bridal book and started perusing the pictures again. A lot of the pictures that I tore out will not work for my venue, but I kept them to use as inspiration. Because if I decided to go the route of using an actual florist, then I would need some inspiration pictures to provide to him/her so that he/she could get the overall “feel” that I was going for. I thought that it might do me some good to flip back through the pictures looking for fresh ideas and inspiration.

And since I’m posting about it, you’ve got to know that I found something. Actually, I found three somethings. I found three separate pictures that I’m going to try to combine into one finished centerpiece idea. I was going to pull in the pictures here, but as they were all three out of magazines that I collected god only knows when...you get that it was impossible to find them. Although I did look for them online, but no luck.

And here is my centerpiece (donated by the lovely Maid Britney!):
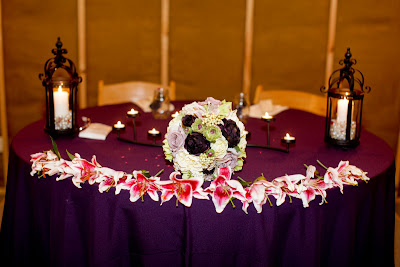
What I am envisioning happening here is this: the centerpiece is filled with water and maybe some green rocks/filler stuff on the bottom to pull in some color (maybe a light lime green, Mama CC?) with one single Stargazer lily floating on top. The candles are all lit and reflecting off the water beautifully. Around the bottom of the centerpiece, I’ve arranged a bed of moss and lovingly inserted a mixture of fresh and artificial flowers into the moss in shades of cream, lavender and light pink…all nestled on top of those GLORIOUS eggplant tablecloths.

To put it simply…I LOVE IT!

It’s perfect. Simple. Elegant. Goes with the theme and overall feel of our wedding. And would be simple enough for me to do on my own, which is important to this cost-conscious bride! And of course, I have the help of my talented Maids and Mama CC and FMIL CC that would also love to help out. Hint, hint ladies!

It incorporates all of my colors, and MOST importantly the ONE SINGLE thing that Mr. CC has requested of me – the Stargazer lily. I was worried about how the hot pink would look against the eggplant, but since it’s off of the table and floating in the vase, I think that it’s perfect. And seriously, after seeing the great shoes that we’re all sporting, how could I still be worried about the combination of eggplant and hot pink?!?!

Can you picture it all too? It’s a little hard, I know. But try.

It was hard for me to picture too, so i did a mock-up at home with some lilies that I bought at HEB. I mean, I didn't even know if lilies actually float!

From here, you can see the bottom of the vases needs something
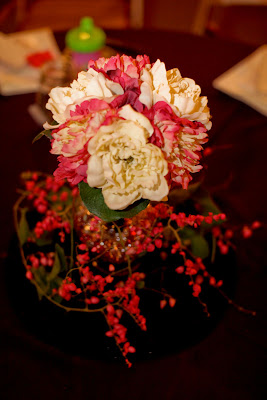
Here's a close-up on the flower...although the lily doesn't float, the petals hold it up...even when water gets in the center of the flower.

This is a view that you would walk up to it on a table and see...looking down...it's stunning!

What do you think?

It might be a little bit of work to make the ring around the bottom that I'm envisioning, but well worth it, I think. And can anyone tell me where I can buy moss? I would love to have real moss, along with real roses and of course real lilies. The rest of the flowers would be artificial, to get the colors that I want during the time period that I want them.

I found some artificial moss at http://www.save-on-crafts.com/ but I can’t help thinking that real moss would be THAT much prettier…any ideas on where I can get that? And on a budget?