Saturday, October 31, 2009

Pretty-Fying the Gift Bags

Another quick project that B told me that I really didn’t HAVE to do was making our gift bags pretty. Yes, I get it. I didn’t have to do it, but they were SO pretty!

I looked high and low for bags that didn’t look like wedding gift bags for us to put our wedding party gifts into...with no luck. So imagine my surprise when I stumbled across brown paper kraft bags and had an AHA! moment right there in the middle of Hobby Lobby. Put the gifts that went in bags into brown paper kraft bags, and buy a roll of brown kraft paper to wrap the shoe boxes – perfect!

And since you know by now if you’ve been following along for any length of time (or even just a few days!) that I had to vamp them up a little.
A stamp here and there...a cute name tag tied on with twine...and Presto! A beautiful gift bag emerges. I loved that the bags also carried our stamp, the same name tags as the escort “cards” and the twine used throughout the wedding. It just all went together and made me happy, which is most important!

Here’s some step-by-step pics...

Before

Applying the stamp
After

Isn’t it lovely? I was wondering what to do about tissue paper for a few minutes until I was like “Duh! You’ve got about a million sheets of cream tissue paper left over from your tissue paper pomander project!” Yes, I talk to myself, and I can be quite silly all at the same time! Then came the fun part, filling the bags with goodies and stuffing them with tissue paper. At the end of the night, this is what we saw...

Picture from Maid Momma - you can just barely see what's on the bottom...


Oops! Did I just give you another sneak preview to what was inside the girls’ bags?!?! I think that I did...stay tuned for more pictures and details! I’m SUCH a tease!

Did you make your gift bags tie into your wedding too, or am I the only one?

Friday, October 30, 2009

My Final Dress Fitting!

I haven't written about my alterations experience yet. There are several reasons why...but mainly because I wasn't sure what all I wanted to talk about. I will do vendor reviews on all of my vendors, and my alterations lady will get her review then...but for now, I'll reveal my final fitting and try to leave my opinions for the later review post.

MOH and I showed up about 4pm on the Thursday (about 10 days) before our wedding. Norma quickly showed us to a dressing room and went to get my dress from the back. We went right to work getting me into my dress...and it was a little harder than I thought it would be!

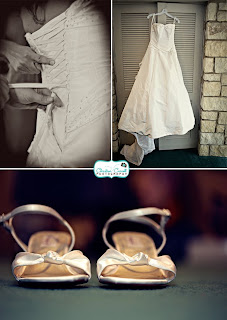
After what felt like forever, I was in my dress and petticoat and shoes...and MOH was struggling to get my dress closed. Yes, ladies, I had a freak out moment when I thought that my dress wasn’t going to fit. MOH gave me a hard time, but since she hadn’t been there the other times to see that the corset flap (that hides behind the straps) was ALWAYS hard to fasten, she didn’t know. After that, we came out of the dressing room so that Norma could give MOH a hand in finding the bustle loops and learning the ins and outs of lacing up a corset. It was easiest to lace me up with the dress bustled, so unfortunately all the pictures show the bustle up, and none were taken with the dress skirt down...sorry! Here's a shot of the bustle:
Right off, we assumed that the best way to lace a corset was top to bottom. But we ran into a little problem. The last two loops on the left side of my corset were caught in the seam, so that they were sewn closed. To be perfectly honest, my Mom had noticed that when we picked up my dress in the first place, but I had forgotten all about it when I took my dress in for alterations with Norma. Oops! After a quick consultation with Norma, we decided to try lacing the corset from bottom to top and see if that worked better...I had a couple of thoughts about what I could do to fix the loop problem in the back on my own, but nothing could be done there in the shop.

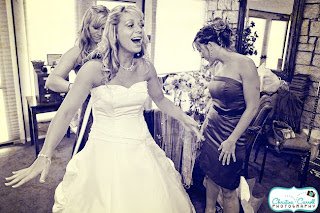
In between lacings, MOH started to have a little TOO much fun!
Yes, she’s “driving” me like a wagon...I thought it was funny, but she didn’t think it was funny that I caught her doing it on camera! Another 10 minutes of lacing and we met with success. MOH had a minute or two of contemplation to figure out how to “tie” the ends off...in the end we settled on putting a knot after the last loop had been laced and tucking the remaining cords into the dress. Which meant that MOH had to dive under my skirts to pull them through. I guessed that I had better get to used to it, since I would need her help to pee the day of the wedding once I was dressed as well! We liked the look of lacing from bottom to top MUCH better. It looked okay, even if I wouldn't be able to fix the bottom two loops...

When we first put the dress on, the hem seemed a little long. But once I was all laced up, it fell just right. You could just barely see my toes peeking out...and my shoes looked gorgeous with the dress! Here I am, hamming it up for the camera. I'd say that I was a LITTLE bit excited to be in my dress...
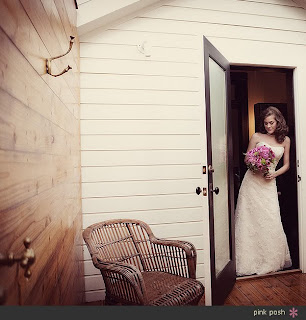
When we got done and it was time to get out of my dress, I struck this pose dramatically in the dressing room and MOH had to recapture the moment on camera! It looks like that plastic bag is perched on my head, but it's hanging on the wall... All in all, a successful second fitting for my dress. And the total on the alterations was more than reasonable as well, it came out to just $75 plus tax, which was reasonable to me for a bustle and a hem. Norma brought B’s suit up to the front, and once I was back in street clothes, I paid for both things and loaded up the car again...little did I know that panic and mayhem would break out when we got home and B tried on his suit...
Stay tuned for more!

Thursday, October 29, 2009

Featured Wedding - Brooke and Preston

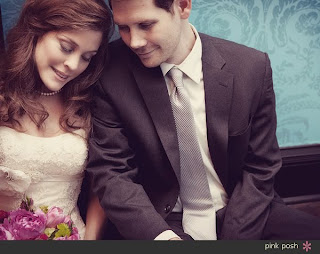
Today's eye candy is brought to us by Pink Posh Photography, one of my favorite Austin photography companies. Read on to see what Pink Posh had to say about this wedding...

"Once in a blue moon, Thurst and I actually get to forego a drive to Houston and shoot a wedding in our town, Austin. :) Brooke and Preston got married in Austin on Saturday to glorious rainfall. It was much needed rain since Austin has been in a horrible drought...and although it wasn't ideal for this couple who had an outdoor wedding planned at the rose garden area of Zilker Botanical, it made for pretty rain pictures afterwards. :) Brooke is also a photographer herself: http://www.brookewestphotography.com/ so it was easy for me to get the shots I needed and wanted for/from them...and plus they gave us plenty of time for them! LOVE THAT! And stalkers, can I tell you guys that I love Brooke+Preston's family. They have the most wonderful family! And I think Brooke+Preston's wedding was the first wedding that we've had so far where the groom's mom admitted to being a blog stalker (HI ANGIE) and the bride's dad made me absolutely blush with all his compliments over the images we've shot. Thank you for that! It's much appreciated. :) So, without further ado...because I know Brooke+Preston's family is eager to see some images from Saturday's wedding....
Stalkers, meet the lovely Brooke and her new husband, Preston. :)"
Enjoy!

You KNOW that I loved the Converse...

And I LOVED that shot with the flower girls covering their eyes while the bride and groom kissed! Too cute!

source

Be sure to stop by Pink Posh's blog to see the rest of the great shots of Brooke and Preston's special day! Congratulations you guys!

Making Cake Labels for the Buffet...

This was a really quick project that took almost NO time to start and complete. Remember, I posted here that I was going to do a cake buffet at our wedding? Well, I followed through on that idea and had all the women of our families (along with my Maids) bring in their favorite cake stands to display them.

Since there were 6 or 7 different types of cake, I wanted to be sure and have some type of sign out telling our guests which cake was which. Enter these simply beautiful cake labels...
Sorry for the dark picture...self use of camera when tired, does NOT make a pretty picture!

Don’t you like them? They make me drool...but they were SUPER easy to make!

First, make a text box in either Word or Power Point (whichever you’re more comfortable with) and use whatever font you’d like. I used the same font that I’d been using through a lot of our paper products just to tie them all in. I printed out all of the details for each cake, and was able to fit two labels on one sheet of paper.

Load in some heavier, cardstock paper into your printer and print.
Cut them out, trim them down using whatever paper cutting tools you prefer...I used both a large trimmer and a smaller one. Score fold lines around the main “label” using your handy dandy bone folder. Stamp/emboss with your favorite design. Once again, I used the same scroll that was used on our save-the-dates, invitations and programs to tie these into the rest of our paper products.

Apply double-sided tape to the bottom of the label and press ends together.Viola! You have a self-standing label for your cake buffet. Or a candy buffet. Or a self-serve bar...the list is endless on where you can use these! I literally started and finished these labels within an hour...but maybe I’m just super wedding woman! Hee hee. I’m so funny! It was just a little touch, but once again, they helped to tie in all of my elements to our wedding together...
What was that? Did I just sneak in a peek at our wedding pictures? I think that I did! Oops, I didn't mean to do that, honest! Just kidding...I'm getting some pictures in from friends and family a little at a time, and trying to put them in some semblance of order...and impossible task I tell you! But that's a before and after shot of our cake buffet...not really clear and no great details shown...hopefully the photographer captured some better shots that I did!

I got the paper here.
Here’s the font that I used.
The rest of the tools were things that I already had...those are harder to share...sorry!

Do you have a design or “theme” that runs throughout your entire wedding like we did? It was really fun, and our guests really seemed to like it all!

Wednesday, October 28, 2009

Programs

Here is the inspiration for my programs:

Yep, those are Mrs. Penguin’s programs from over at Weddingbee. If you read weddingbee, you know that there are some AMAZING program inspirations over there, but these were my favorites. Plus, I liked the simplicity of it all. So now you know what I started with...and here’s what I finished with... What do you think? Simple. Elegant. Classy.

I love them. They were slightly a pain in the rear to make...but not really. Just time consuming since I wanted to emboss them twice. But that was MY choice, so my own downfall. Oh well. They turned out lovely, and I even had a helper...
photo by ME!

Isn’t he cute working that embossing gun? I kept having to remind him NOT to watch tv while aiming the gun at the paper...a few got burned! It was nice to have the help, and I promise to show you a full tutorial later on...just trying to catch up and show you all of the projects before posting any of the wedding re-cap photos that I’ve been able to get my hands on. Nothing from the photographer, but lots of friends’ pictures are pouring in!

Did you find inspiration from someone else’s design for your programs? Or did you come up with it all on your own?

Veil Reveal

I haven’t talked much about my veil. Not because I didn’t like it, or didn’t know what I wanted...but mainly because the veil was NOT something that I did via DIY. What’s that?!?! I know, I know...it’s shocking that there is a project that I didn’t do, right? Now that you’re done laughing at me, I can explain. I did this project via DIB – Do-It-Bridesmaid...yep, I assigned this task to a VERY helpful bridesmaid. And she did a fabulous job! I can’t thank her enough, especially now that I know all the ins and outs and details of what it took to make this project happen.

I think that this post really isn’t making much sense so far, so let me back up and start over...hop on into the A Bride Again time machine and let’s rewind back to June. Remember from here that I went to Dallas for a weekend of shopping with my Maids? Well, one of the main things on the To Do List for that weekend was showing the girls my dress and playing around with hair style, jewelry, and veil options. I showed you pictures here of the veil that I liked most. What I didn’t like so much? The price tag of $299. I was CERTAIN that this veil could be found cheaper.

Sometimes being cheap pays off. Sometimes it doesn’t. In this particular instance (and there were many that went the other way during wedding planning!) it paid off to do a little research. First off, I got the model # from the bridal salon and started “googling” the veil that I liked so much. The bad news was that I didn’t find anything really exciting. The good news is that I did find a boutique in Dallas (Grapevine, actually) that sold something that looked similar for about ½ the cost. The even better news? After seeing what was avialable out there, I was certain that this veil could be made.
Enter Maid Britney. She had a name of a woman that she gave to me - the lady that did all of her bridal gown alterations and even made her veil for her wedding a year ago. After a few emails back and forth, Penny and I were fast friends, and she gave me a quote of $35 for a 2-tiered fingertip length veil. Sweet! She emailed me about a month later and said that it was ready to ship, and I mailed her a check. But I did NOT have her ship it...you see, Maid Britney had been asking what she could do to help me out. I had decided that since the veil was so cheap to have made, I would buy it unadorned and glue the crystals onto the veil. Sounds kinda tacky when I’m typing it all out, but trust me, the end result was stunning!

So I found crystals from this site online and had them shipped directly to Maid Britney’s house. Then I went and found the fabric glue that I thought would work and took a picture of it and emailed it to Maid Britney so she would know what to get. It was then simply a matter of devising a pattern and doing the dirty work.

I say simple...but it turns out that this project was QUITE labor intensive. Maid Britney didn’t mind doing the labor at ALL, but it was more work than I meant for it to be once she got going on it. First off, we didn’t order enough crystals. Secondly, we didn’t order enough crystals the second time around either. Thirdly, the glue worked great – but only if it dried completely before moving it off of the pattern template. Which means that Maid Britney had to work on the veil 30 minutes at a time.

Pull crystal out of pile with tweezers. Apply small dab of fabric glue. Place on veil material over pattern. Repeat until you reach the edge of your pattern page. Allow all crystals to dry completely before removing pattern paper. Start over where you left off.

We underestimated the dry time factor, the amount of crystals needed to go around a veil, and the overall work that this would be. We ended up deciding to not line both overlapping sides with crystals, just the top layer - which saved some time and crystals. And then at the final hair styling appointment (since I didn’t have the veil for my hair trial) we ran into a “small” problem that I couldn’t have forseen...but that’s for later. Right now, we’ll let the photos speak for themselves...here are the before pictures:
source - Maid Britney
And about three quarters of the way through the project...
See where they overlap? You couldn't even tell when I was wearing it that both layers weren't lined with crystals!
source - Maid Britney

Doesn’t it sparkle so much? And don’t you love Maid Britney’s modeling job of the veil? She deserves a round of applause!

All in all, the veil was delivered along with Maid Britney two days before the wedding...and it was beautiful. It complimented my dress gorgeously...and was SUPER sparkly. I loved it, which hopefully made all of Maid Britney’s hard work worth it!

Are you attempting to make your own veil? How is it going?


Tuesday, October 27, 2009

Featured Wedding - Melissa and Kelly

Well...I'm back, but not really. Catching up at work was really hard today, so instead of working on my blog yesterday like a good bride...or doing a real post tonight, I think that I'll just give you something to drool over!

This amazing wedding was brought to my by our fabulous photographer, Christina Carroll of Christina Carroll Photography. After working with her on our wedding (can't WAIT to see!), I can truly say that she is amazing to work with...here's what she had to say about this wedding:

"Melissa & Kelly had a really fun wedding in Horseshoe Bay. The got married at The Church at Horseshoe Bay and had their reception at Lakeside Pavilion which was right on Lake Marble Falls. After the wedding we went down with the bridal party and got some fun pictures on the dock. Everyone had a great time at the reception. Melissa & Kelly even got serenaded by some of the groomsmen! "
Check out this wedding...


Yes, I know that look well!!!

I LOVE the grey dresses! And check out these more "casual" shots...

Now for some details of the party...

source

We had crazy dancing as well...but no groomsmen rearranged their suits for some karaoke action...all in all, this one looked like a FUN wedding. Be sure and head over to Christina's blog to see more pictures of Melissa and Kelly!

See you tomorrow with some catch-up stuff and "real" posts!