
I haven’t talked much about my veil. Not because I didn’t like it, or didn’t know what I wanted...but mainly because the veil was NOT something that I did via DIY. What’s that?!?! I know, I know...it’s shocking that there is a project that I didn’t do, right? Now that you’re done laughing at me, I can explain. I did this project via DIB – Do-It-Bridesmaid...yep, I assigned this task to a VERY helpful bridesmaid. And she did a fabulous job! I can’t thank her enough, especially now that I know all the ins and outs and details of what it took to make this project happen.
I think that this post really isn’t making much sense so far, so let me back up and start over...hop on into the A Bride Again time machine and let’s rewind back to June. Remember from here that I went to Dallas for a weekend of shopping with my Maids? Well, one of the main things on the To Do List for that weekend was showing the girls my dress and playing around with hair style, jewelry, and veil options. I showed you pictures here of the veil that I liked most. What I didn’t like so much? The price tag of $299. I was CERTAIN that this veil could be found cheaper.
Sometimes being cheap pays off. Sometimes it doesn’t. In this particular instance (and there were many that went the other way during wedding planning!) it paid off to do a little research. First off, I got the model # from the bridal salon and started “googling” the veil that I liked so much. The bad news was that I didn’t find anything really exciting. The good news is that I did find a boutique in Dallas (Grapevine, actually) that sold something that looked similar for about ½ the cost. The even better news? After seeing what was avialable out there, I was certain that this veil could be made.
Enter Maid Britney. She had a name of a woman that she gave to me - the lady that did all of her bridal gown alterations and even made her veil for her wedding a year ago. After a few emails back and forth, Penny and I were fast friends, and she gave me a quote of $35 for a 2-tiered fingertip length veil. Sweet! She emailed me about a month later and said that it was ready to ship, and I mailed her a check. But I did NOT have her ship it...you see, Maid Britney had been asking what she could do to help me out. I had decided that since the veil was so cheap to have made, I would buy it unadorned and glue the crystals onto the veil. Sounds kinda tacky when I’m typing it all out, but trust me, the end result was stunning!
So I found crystals from this site online and had them shipped directly to Maid Britney’s house. Then I went and found the fabric glue that I thought would work and took a picture of it and emailed it to Maid Britney so she would know what to get. It was then simply a matter of devising a pattern and doing the dirty work.
I say simple...but it turns out that this project was QUITE labor intensive. Maid Britney didn’t mind doing the labor at ALL, but it was more work than I meant for it to be once she got going on it. First off, we didn’t order enough crystals. Secondly, we didn’t order enough crystals the second time around either. Thirdly, the glue worked great – but only if it dried completely before moving it off of the pattern template. Which means that Maid Britney had to work on the veil 30 minutes at a time.
Pull crystal out of pile with tweezers. Apply small dab of fabric glue. Place on veil material over pattern. Repeat until you reach the edge of your pattern page. Allow all crystals to dry completely before removing pattern paper. Start over where you left off.
We underestimated the dry time factor, the amount of crystals needed to go around a veil, and the overall work that this would be. We ended up deciding to not line both overlapping sides with crystals, just the top layer - which saved some time and crystals. And then at the final hair styling appointment (since I didn’t have the veil for my hair trial) we ran into a “small” problem that I couldn’t have forseen...but that’s for later. Right now, we’ll let the photos speak for themselves...here are the before pictures:

 source - Maid Britney
And about three quarters of the way through the project...
See where they overlap? You couldn't even tell when I was wearing it that both layers weren't lined with crystals!


 source - Maid Britney
Doesn’t it sparkle so much? And don’t you love Maid Britney’s modeling job of the veil? She deserves a round of applause!
All in all, the veil was delivered along with Maid Britney two days before the wedding...and it was beautiful. It complimented my dress gorgeously...and was SUPER sparkly. I loved it, which hopefully made all of Maid Britney’s hard work worth it!
Are you attempting to make your own veil? How is it going?
 And from the back…
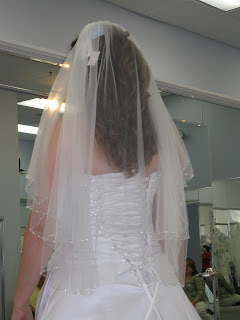 Hey notice how well my Work Out Wagon results are showing? This dress that the store had was actually a size smaller than mine, which is why the V doesn't meet at the top...but my back view is improving!
 I have to admit that I like the look of having my hair up. A little more formal, and dressy…maybe even more princessy. Yes, that’s a word. There are a few options when your hair is up on where to place the veil. Above is pictured placing the veil over the updo.
 Our helper, Brandi, placing the veil beneath my updo as an option. Here’s a view of that same style from the back…
 Once again, excuse the updo…and I don’t know WHAT I was doing with my hands…I kinda like this look. Other than it might tend to leave the front looking a little bare…which can always be fixed with the addition of something sparkly. Other than that one fact, I think that I REALLY like this option! Something that I hadn’t even considered.


