
So I’ve had a request from a reader to give a little more detail on how I made my invitations. Since I think that the request is geared more towards the design process than the part where I lined up the papers, mounted them and put it all together was more straight-forward, I’ll start with some tips and steps that I used to actually design the invites.
First and foremost, you need to know the size that you want to end up with. For me, this meant that I needed to figure out the size of the pocketfold first. Once I had that, then I would have a starting point for my invites. You should also consider the size of envelope that you want to work with, as that could be a factor as well. If you want to use an odd-size envelope (like square) then you might start there.
So, I’ll walk you through my process...
Once you have a starting size, open a new document in Word.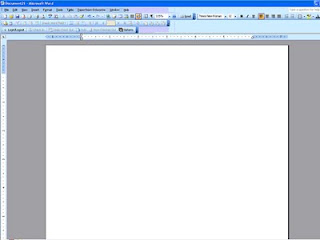 Then at the top of the screen, select Insert. From that drop-down, select Text Box.
 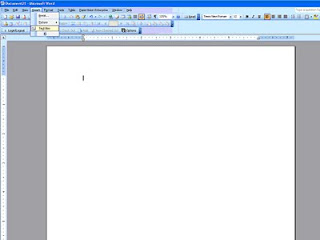 This will add a text box on the screen (you may have to click once or twice to get it placed on the screen). It will have a border, and probably be small in size, but those are things that you can change so don’t worry about it.
 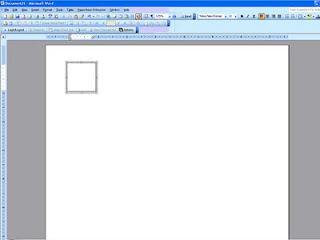 If you play with your mouse/cursor a little you’ll notice that the cursor changes shapes...when not on the text box it’s a normal arrow...when altering the WHOLE text box, it becomes a cross with arrows. This is important, because to make changes to the box, you have to place the cursor to where it changes to the cross with arrows and click to activate the whole text box. When the whole text box is selected, some dots and circles appear on the border of the box, instead of just lines to make the border.
Once the whole text box is selected, you can right click your mouse and a list of options appears.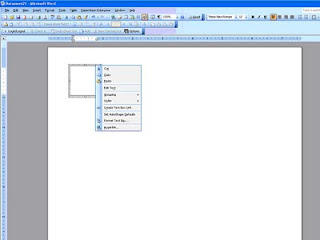 Select Format Text Box. This will open up a new box on your screen. (If you didn’t select the whole text box, then that selection will not appear from the menu. Go back and try to re-select the whole text box and try again.)
 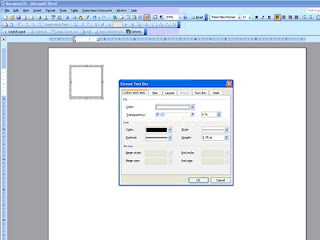 There are several tabs across the top. The two that I mainly deal with are Size and then Colors and Lines.
First, let’s make the text box the right size. Click on the tab Size and input the height and width that you desire. For instance, if I’m making a 5”x7” invitation, I would put in 5” in the width and 7” in the height box.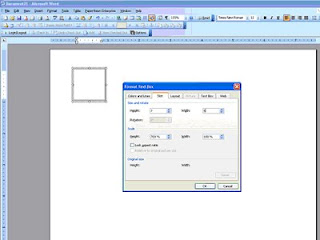 Now, if I was making a 5”x7” invitation that would be mounted on cardstock or some other paper, I would go a little smaller, like 4.75”x6.75” in order to make the matte a true 5”x7” and the invitation centered upon it. Does that make sense? You can enter in any size you want, you don’t have to use the up and down arrows that you see to the side of the size boxes. Once you get your size entered, click on “OK.”
Your text box immediately changes size to what you specified.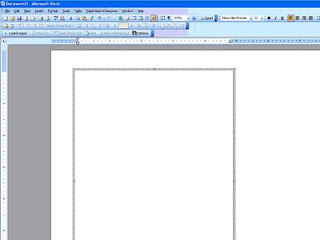 Sometimes I get confused on which direction I want the box to run on the paper and I mix up my width measurement with my height measurement. No big deal. Right click the box again and go through the process just swap the measurements. Click OK and your box will re-orient.
Next, I would drag the text box to where I wanted it to print on the paper.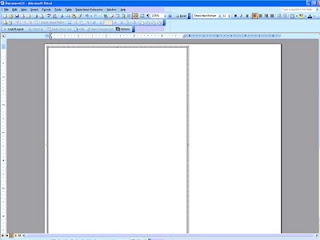 This part was important to me, as I tried to get as much out of each sheet of paper as I could, so the layout of the boxes was muy importante. I would make all the text boxes for everything and then play with dragging and dropping to see what would fit together. Tip: If something doesn’t fit one direction, change the page layout to Landscape and try the boxes that way. If you go up to file and try to select Page Setup and find that it’s “greyed out” then you need to go back to your document and click OUTSIDE of the text box and then go back and try again. I ran into this time and time again...so hopefully that little tip will save you some headaches.
If that still doesn’t work, think about changing the direction that your text box itself lays. Lay it side-to-side instead of up-and-down, because text will print in any direction.
To move your text boxes to the edges of the paper and have it print successfully, you will also need to change the margins on your paper. Caution: Word does not like 0 margins...I learned that the hard way. You should usually leave .3” on all sides...Word stays happier that way. I take all my margins down to .3” just to maximize my paper, but that’s just my preference.
Once your text box is where you want it, it’s very simple to insert the text. Move your mouse/cursor inside the box and click. You’ll see a blinking cursor appear inside the text box and you’re ready to type away.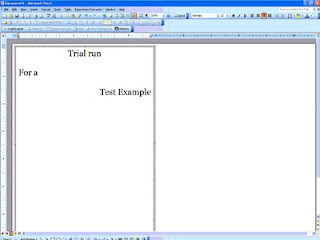 Just like any document, you can fiddle with the alignment (left, right, center) and use any font and size that you want. Like I mentioned earlier, you can also have your text print in any direction. There’s a Text Direction option under Format at the top of your screen. Just be sure that you’ve clicked inside the text box that you want to change, and then select how you want your text to print.
Just be careful about staying within your border. If it doesn’t show in the text box, it’s not going to print on the paper either! You can mix alignments, font and font sizes until you’re satisfied with your final product.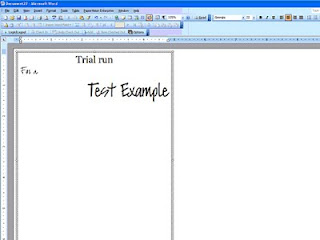 You cannot mix text directions within ONE single text box. But you CAN lay text boxes up against each other (or even slightly on top of each other) if you wanted some words to print one way and others to print a different direction. Just practice with it and you’ll figure out how you like it.
Once you’re happy with what’s inside your text box, I would change the border. For my own taste, I’m cutting most things out and choose not to have a printed border. But, borders can be fun and a neat and tidy way to close your text box. Remember my petal bags? I used two text boxes to get those two borders, and it worked great for that project. But for my invitations, I was cutting them all out, so I didn’t want lines. But I did want some cutting guidelines...
To get cutting guidelines, I just right clicked the whole text box (cross with arrows) and selected Format Text Box. Using the tab titled Colors and Lines, you’ll find two important features.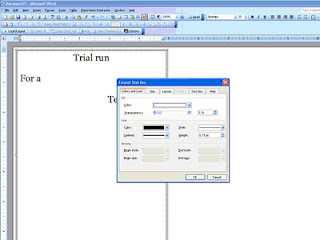 The Fill feature and the Line feature of your box. Let’s talk Line first.
You can change the color of your Line/Border to anything that Word can create. You can also change the style of the line, making it whole, dotted or dashed and several combinations of the three. And last, but not least, you can change the thickness. For cutting guidelines, I selected a light grey color, a dashed line and a thickness of just .75.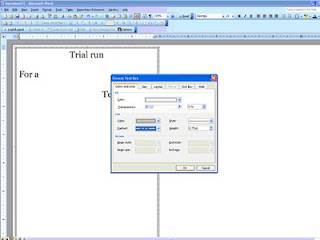 That made faint lines that I could barely see (in some instances) to use to guide my cut.
 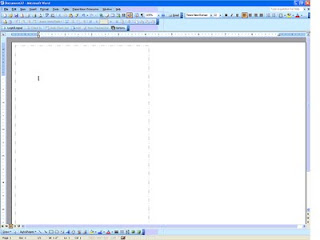 See? You can barely see them...and I had to make those at 1.25 in thickness just so they would show up here. But they weren’t dark enough to still show badly if I didn’t cut exactly perfect either.
Play around with it and see what you prefer. You have to click OK to see the changes in the border, just like seeing the changes in sizing earlier.
The other thing that I mentioned that you can find on the Colors and Lines tab was the transparency of your text box, or Fill. There is a sliding adjustment bar in this box that allows you to make your text box non-transparent, semi-transparent or transparent and all degrees in between those options. Just slide it around and play with it...I personally prefer all of my text boxes to be transparent (slide all the way to the right), but once again that’s my preference only.
If you’re using two text boxes to achieve a double boxed look (like petal bags) then the text box on the outside will need to either be made transparent to show the inside box through it, or you can play with the order of the boxes, bringing one forward or sending one backward to achieve the same goal. I think that it’s easiest to make one transparent, so that’s why I told you that way. But just know that there are other options to achieve the same goal.
The last thing that you’re going to want to do is a test print. You always, always, always want to do a test print. I cannot stress this step enough! Every printer is unique and different, and reacts differently to different types of paper and margin settings. Just because the text box shows to be fully on the piece of paper on the screen with the entire text showing does NOT mean that it will print that way. Many times, I would do my test print to see the bottom ¼ inch of the text box missing. Usually simple to fix, just drop and drag the text box up one or two clicks. Other times, you may have to get more creative than that...
So that’s it in a nutshell. You can also do most of this in Power Point, I believe. I’m not as familiar with Power Point, which is why I chose Word. But after the first trial run project created this way, I had really learned the ropes and ALL of my paper products were designed in Word by moi. And the first trial run wasn’t hard by any means, but it was frustrating...my boxes kept moving and disappearing and I couldn’t find them again...but just keep at it and you’ll get the hang of it, I’m sure!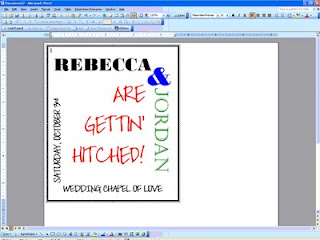 Before long, you’ll be able to make something like that! Well hopefully, yours will be MUCH prettier, but I was trying to illustrate that a little practice will do wonders for your skill level.
Next up? We’ll talk about adding clip art or images into text boxes (think maps!) which requires a whole post to itself! I hope this helped answer some questions...if you have more specific questions, feel free to email me or comment below and I’ll get back with you one on one.
First and foremost, you need to know the size that you want to end up with. For me, this meant that I needed to figure out the size of the pocketfold first. Once I had that, then I would have a starting point for my invites. You should also consider the size of envelope that you want to work with, as that could be a factor as well. If you want to use an odd-size envelope (like square) then you might start there.
So, I’ll walk you through my process...
Once you have a starting size, open a new document in Word.
Then at the top of the screen, select Insert. From that drop-down, select Text Box. This will add a text box on the screen (you may have to click once or twice to get it placed on the screen). It will have a border, and probably be small in size, but those are things that you can change so don’t worry about it. If you play with your mouse/cursor a little you’ll notice that the cursor changes shapes...when not on the text box it’s a normal arrow...when altering the WHOLE text box, it becomes a cross with arrows. This is important, because to make changes to the box, you have to place the cursor to where it changes to the cross with arrows and click to activate the whole text box. When the whole text box is selected, some dots and circles appear on the border of the box, instead of just lines to make the border.Once the whole text box is selected, you can right click your mouse and a list of options appears.
Select Format Text Box. This will open up a new box on your screen. (If you didn’t select the whole text box, then that selection will not appear from the menu. Go back and try to re-select the whole text box and try again.) There are several tabs across the top. The two that I mainly deal with are Size and then Colors and Lines.First, let’s make the text box the right size. Click on the tab Size and input the height and width that you desire. For instance, if I’m making a 5”x7” invitation, I would put in 5” in the width and 7” in the height box.
Now, if I was making a 5”x7” invitation that would be mounted on cardstock or some other paper, I would go a little smaller, like 4.75”x6.75” in order to make the matte a true 5”x7” and the invitation centered upon it. Does that make sense? You can enter in any size you want, you don’t have to use the up and down arrows that you see to the side of the size boxes. Once you get your size entered, click on “OK.”Your text box immediately changes size to what you specified.
Sometimes I get confused on which direction I want the box to run on the paper and I mix up my width measurement with my height measurement. No big deal. Right click the box again and go through the process just swap the measurements. Click OK and your box will re-orient.Next, I would drag the text box to where I wanted it to print on the paper.
This part was important to me, as I tried to get as much out of each sheet of paper as I could, so the layout of the boxes was muy importante. I would make all the text boxes for everything and then play with dragging and dropping to see what would fit together. Tip: If something doesn’t fit one direction, change the page layout to Landscape and try the boxes that way. If you go up to file and try to select Page Setup and find that it’s “greyed out” then you need to go back to your document and click OUTSIDE of the text box and then go back and try again. I ran into this time and time again...so hopefully that little tip will save you some headaches.If that still doesn’t work, think about changing the direction that your text box itself lays. Lay it side-to-side instead of up-and-down, because text will print in any direction.
To move your text boxes to the edges of the paper and have it print successfully, you will also need to change the margins on your paper. Caution: Word does not like 0 margins...I learned that the hard way. You should usually leave .3” on all sides...Word stays happier that way. I take all my margins down to .3” just to maximize my paper, but that’s just my preference.
Once your text box is where you want it, it’s very simple to insert the text. Move your mouse/cursor inside the box and click. You’ll see a blinking cursor appear inside the text box and you’re ready to type away.
Just like any document, you can fiddle with the alignment (left, right, center) and use any font and size that you want. Like I mentioned earlier, you can also have your text print in any direction. There’s a Text Direction option under Format at the top of your screen. Just be sure that you’ve clicked inside the text box that you want to change, and then select how you want your text to print.Just be careful about staying within your border. If it doesn’t show in the text box, it’s not going to print on the paper either! You can mix alignments, font and font sizes until you’re satisfied with your final product.
You cannot mix text directions within ONE single text box. But you CAN lay text boxes up against each other (or even slightly on top of each other) if you wanted some words to print one way and others to print a different direction. Just practice with it and you’ll figure out how you like it.Once you’re happy with what’s inside your text box, I would change the border. For my own taste, I’m cutting most things out and choose not to have a printed border. But, borders can be fun and a neat and tidy way to close your text box. Remember my petal bags?
I used two text boxes to get those two borders, and it worked great for that project. But for my invitations, I was cutting them all out, so I didn’t want lines. But I did want some cutting guidelines...To get cutting guidelines, I just right clicked the whole text box (cross with arrows) and selected Format Text Box. Using the tab titled Colors and Lines, you’ll find two important features.
The Fill feature and the Line feature of your box. Let’s talk Line first.You can change the color of your Line/Border to anything that Word can create. You can also change the style of the line, making it whole, dotted or dashed and several combinations of the three. And last, but not least, you can change the thickness. For cutting guidelines, I selected a light grey color, a dashed line and a thickness of just .75.
That made faint lines that I could barely see (in some instances) to use to guide my cut. See? You can barely see them...and I had to make those at 1.25 in thickness just so they would show up here. But they weren’t dark enough to still show badly if I didn’t cut exactly perfect either.Play around with it and see what you prefer. You have to click OK to see the changes in the border, just like seeing the changes in sizing earlier.
The other thing that I mentioned that you can find on the Colors and Lines tab was the transparency of your text box, or Fill. There is a sliding adjustment bar in this box that allows you to make your text box non-transparent, semi-transparent or transparent and all degrees in between those options. Just slide it around and play with it...I personally prefer all of my text boxes to be transparent (slide all the way to the right), but once again that’s my preference only.
If you’re using two text boxes to achieve a double boxed look (like petal bags) then the text box on the outside will need to either be made transparent to show the inside box through it, or you can play with the order of the boxes, bringing one forward or sending one backward to achieve the same goal. I think that it’s easiest to make one transparent, so that’s why I told you that way. But just know that there are other options to achieve the same goal.
The last thing that you’re going to want to do is a test print. You always, always, always want to do a test print. I cannot stress this step enough! Every printer is unique and different, and reacts differently to different types of paper and margin settings. Just because the text box shows to be fully on the piece of paper on the screen with the entire text showing does NOT mean that it will print that way. Many times, I would do my test print to see the bottom ¼ inch of the text box missing. Usually simple to fix, just drop and drag the text box up one or two clicks. Other times, you may have to get more creative than that...
So that’s it in a nutshell. You can also do most of this in Power Point, I believe. I’m not as familiar with Power Point, which is why I chose Word. But after the first trial run project created this way, I had really learned the ropes and ALL of my paper products were designed in Word by moi. And the first trial run wasn’t hard by any means, but it was frustrating...my boxes kept moving and disappearing and I couldn’t find them again...but just keep at it and you’ll get the hang of it, I’m sure!
Before long, you’ll be able to make something like that! Well hopefully, yours will be MUCH prettier, but I was trying to illustrate that a little practice will do wonders for your skill level.Next up? We’ll talk about adding clip art or images into text boxes (think maps!) which requires a whole post to itself! I hope this helped answer some questions...if you have more specific questions, feel free to email me or comment below and I’ll get back with you one on one.


No comments:
Post a Comment